Introduction to VREP (aka CopeliaSim) Simulator
EGB320 VREP Lunar Files (v1.0)This article discusses the Virtual Robot Experimentation Platform (VREP) simulation environment which has now changed its name to CopeliaSim. This article will discuss VREP and how it can be used to test the design of your robot especially the mobility and navigation systems. However, VREP could be used for almost all aspects of your project to help refine your design.
VREP has been installed on QUT's computers within S901 as well as the computer labs used by EGB320 (R214 and G216). However, you can also download and install a copy to your personal computer, see VREP Downloads.
What is VREP
VREP is a standalone environment which allows the simulation of complex dynamic behaviours, such as two complex shapes colliding. It has been tailored specifically for robotic systems. You can create scenes and robot models complete with controllable motors and sensors. You can even get an image from a virtual camera. VREP also allows you to control your robot through Python. To see more about VREP check out their website, VREP Website. The video below is an example of what VREP can do and what you could use it for in this design project.
Setting Up Your VREP Scene
Make sure you have downloaded and extracted the EGB320 VREP files, see the top of the page for download link.
To setup the scene for this design project we must first launch VREP. The teaching team have already created two scenes, one for a differential drive robot and one for a differential skid steer drive robot. Once VREP has launched, select File -> Open Scene then navigate to where you extracted the EGB320 VREP files and open up the scenes folder. To load in your desired scene either EGB320LunarScene_Differential.ttt or EGB320LunarScene_SkidSteer.ttt. Ensure that there is only one of one robot within the scene at all times. After opening the file your VREP workspace should contain the Robot Arena, as well as 3 obstacles, 3 samples and 3 rocks on a side table.
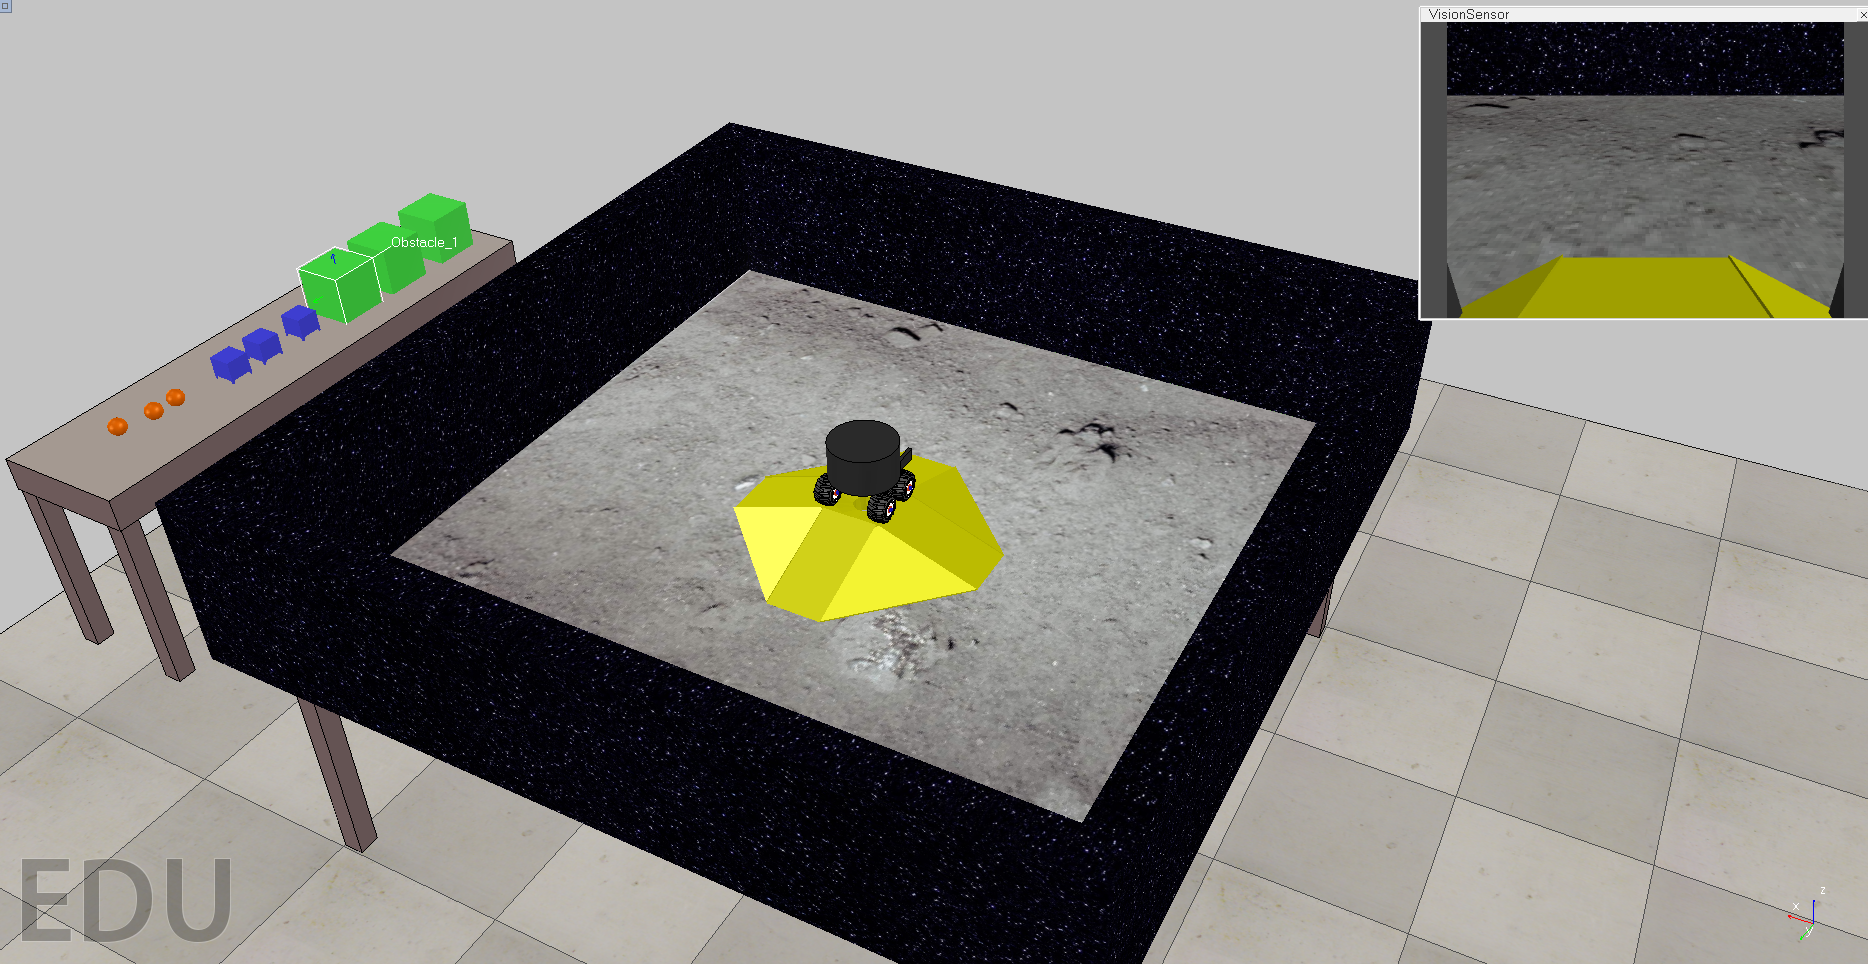
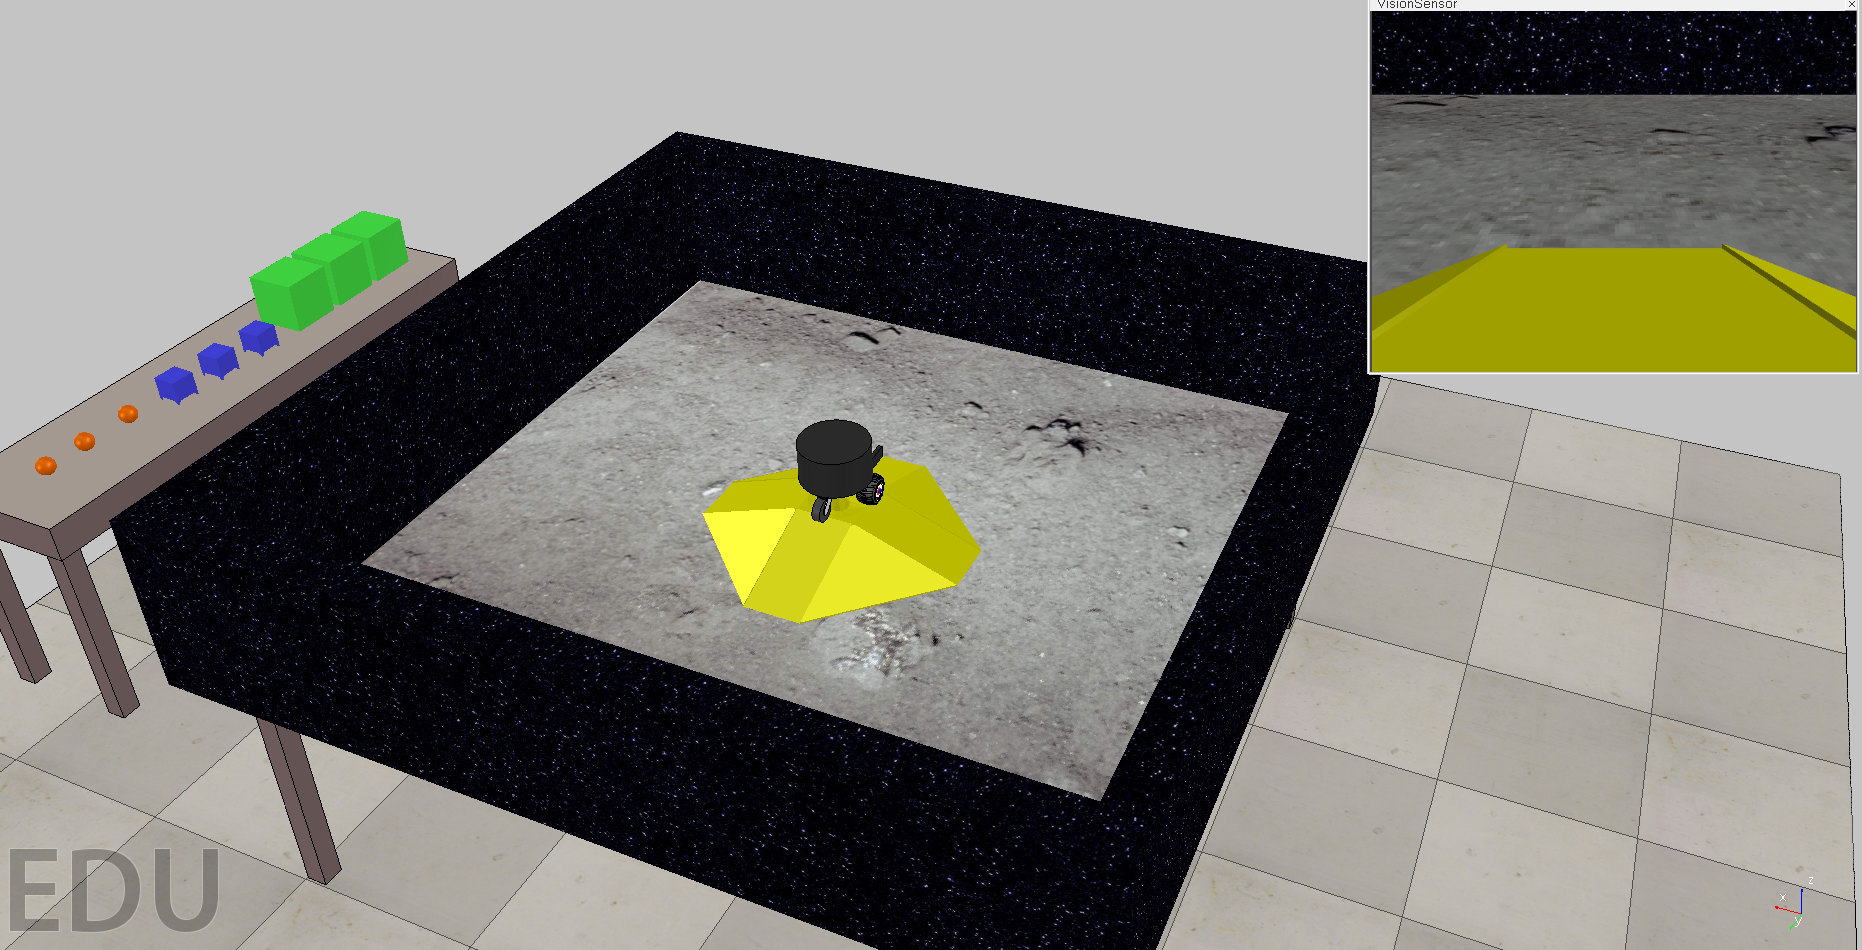
Next we will add what is known as a 'floating view' to allow us to visualise what the camera is seeing. To do this right click anywhere within the scene and then select Add -> Floating View. Now click on the object titled 'VisionSensor' on the right hand side of the screen within the Scene Hierarchy tree. Finally, right click on the newly created floating view and select View -> Associate view with selected vision sensor.
So you do not have to create a floating view each time, we are now going to save this scene under a new name. Select File -> Save Scene As. Then save the scene giving it a new name. We are now ready to start controlling our robot via Python.
There are plenty of tutorials online if you would like to know how to build robots and scenes within VREP. One good example is The Bubble Bot Tutorial. This tutorial also shows you how to write scripts within VREP to control your robot.
Coordinate Frames
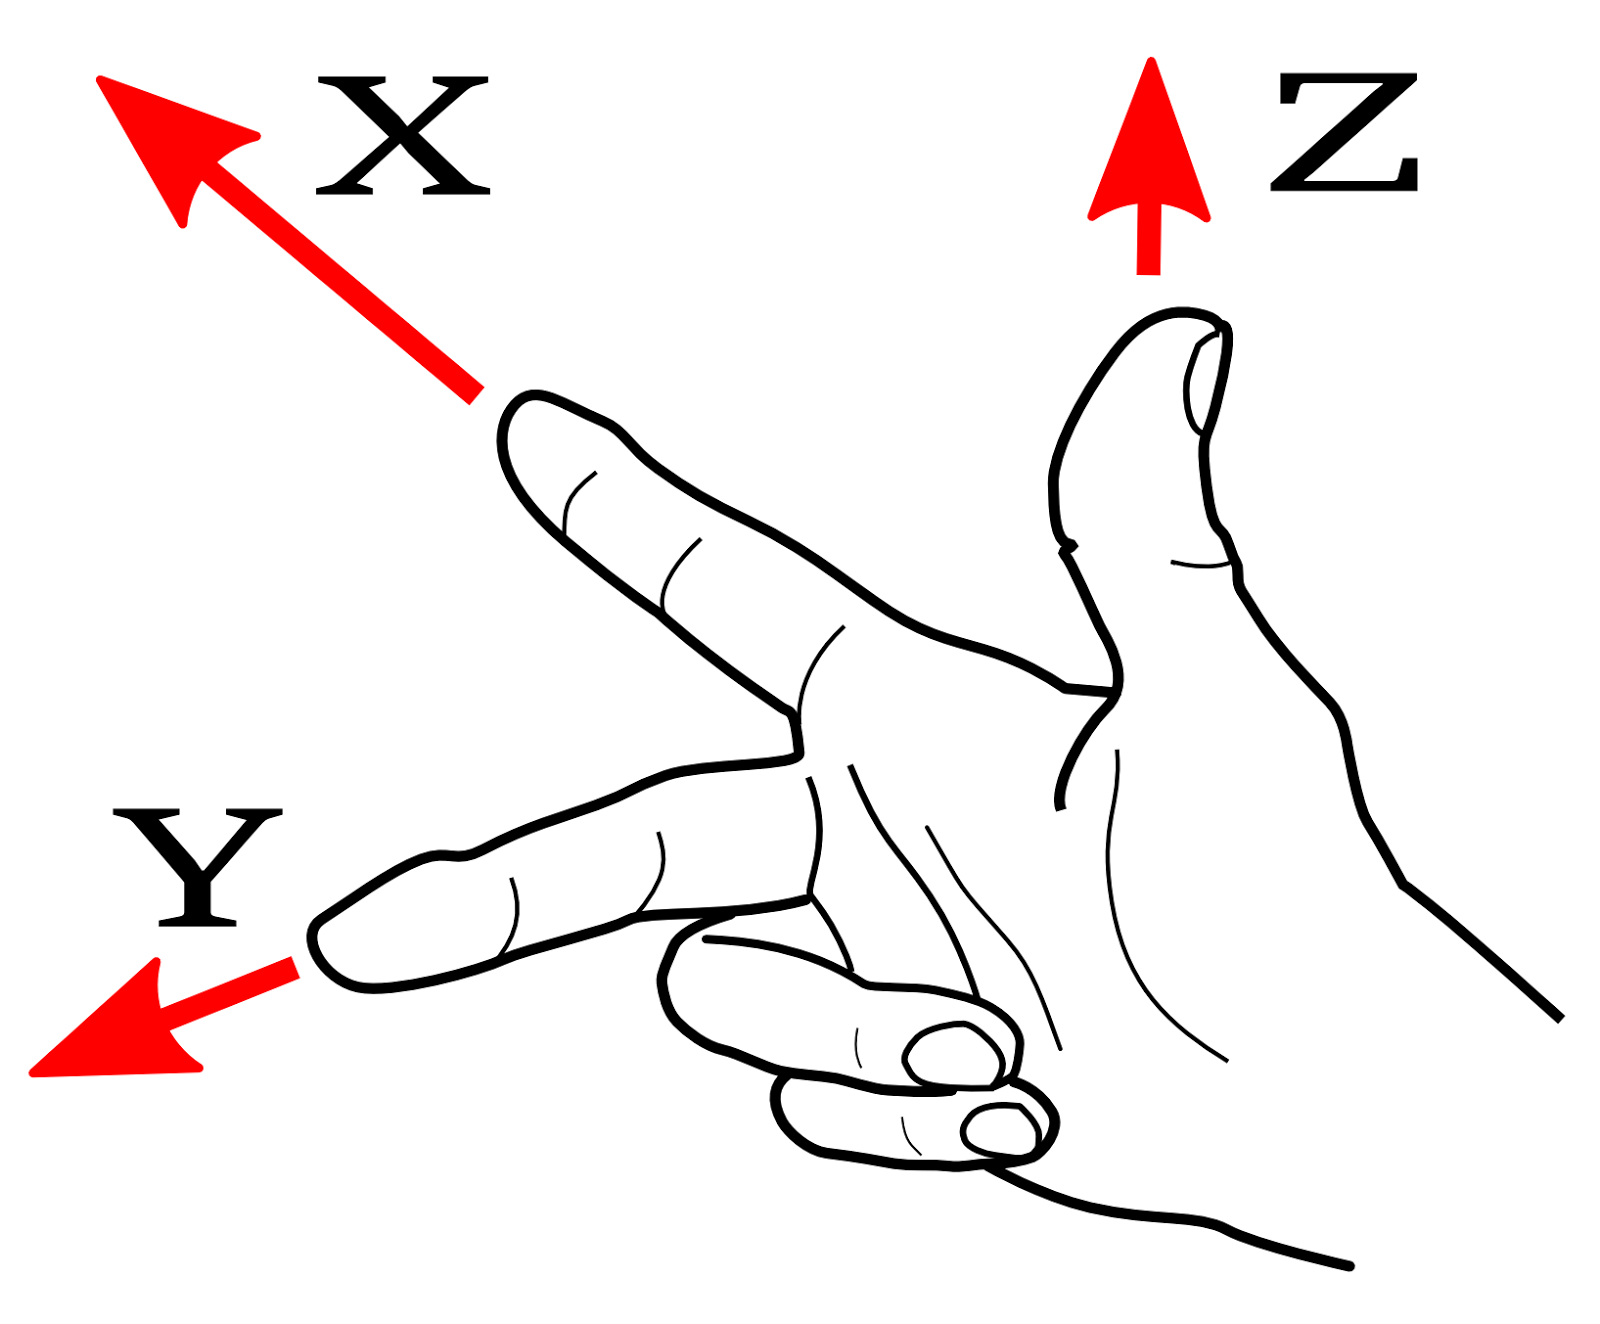
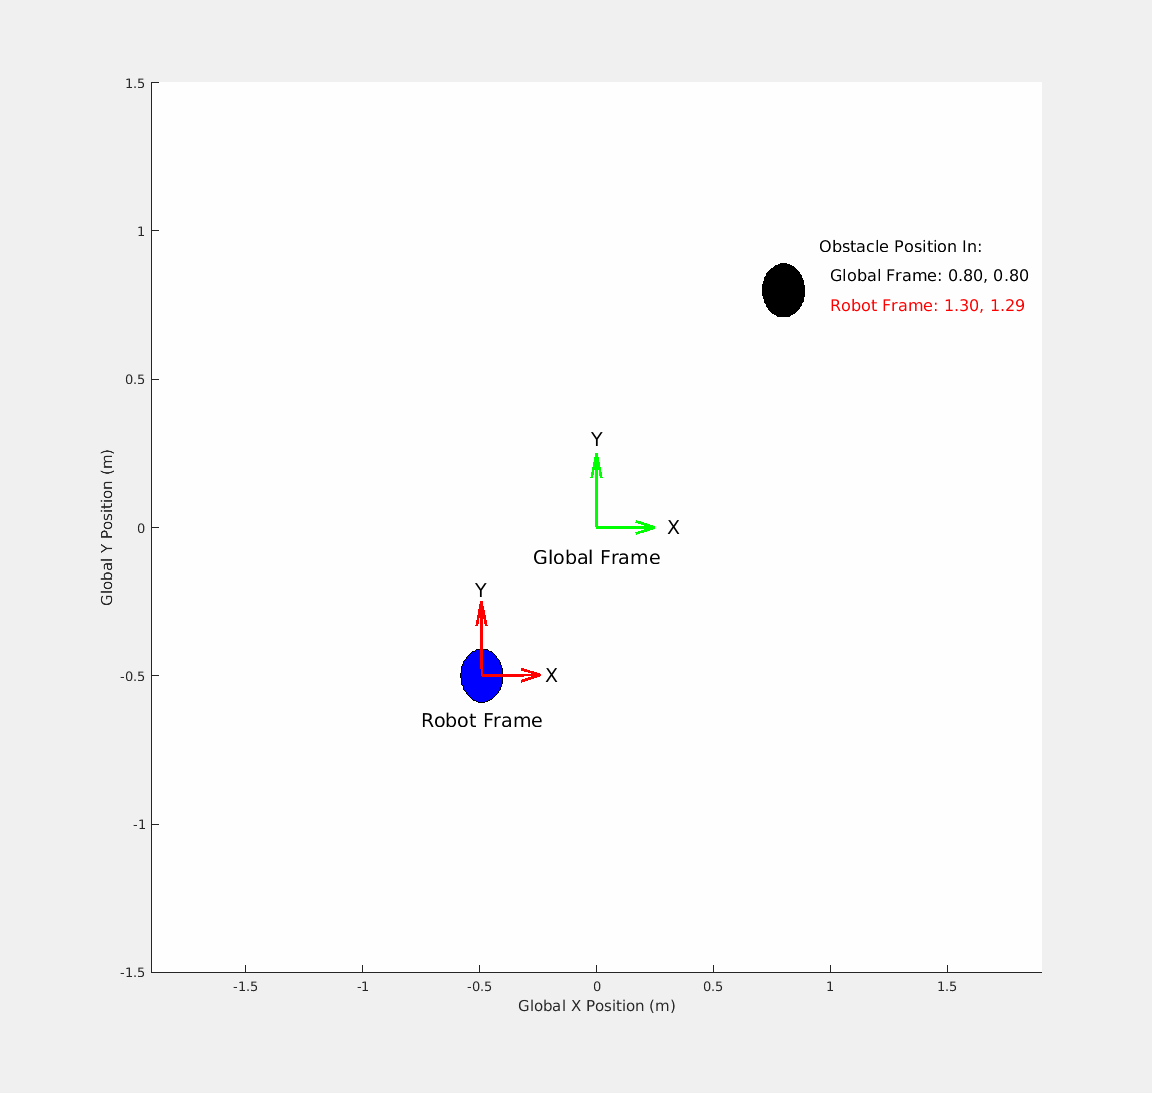
A coordinate frame is a reference point that we use to determine how far something is in the x, y and z directions. Remember all coordinate frames should follow the right hand rule. The X axis points in the same direction as your index finger, the Y axis points in the direction of your middle finger bent at 90 degrees, and the Z axis points in the direction of your thumb.
When dealing with mobile robots we typically have at least two coordinate frames, a global coordinate frame and a robot or local coordinate frame.
The global coordinate frame is static, it is our absolute origin. Within our scene the global coordinate frame is defined to be within the centre of the arena with x axis pointing towards the yellow goal, the y axis pointing up the field (if the yellow goal is on the right hand side), and the z axis pointing towards the sky.
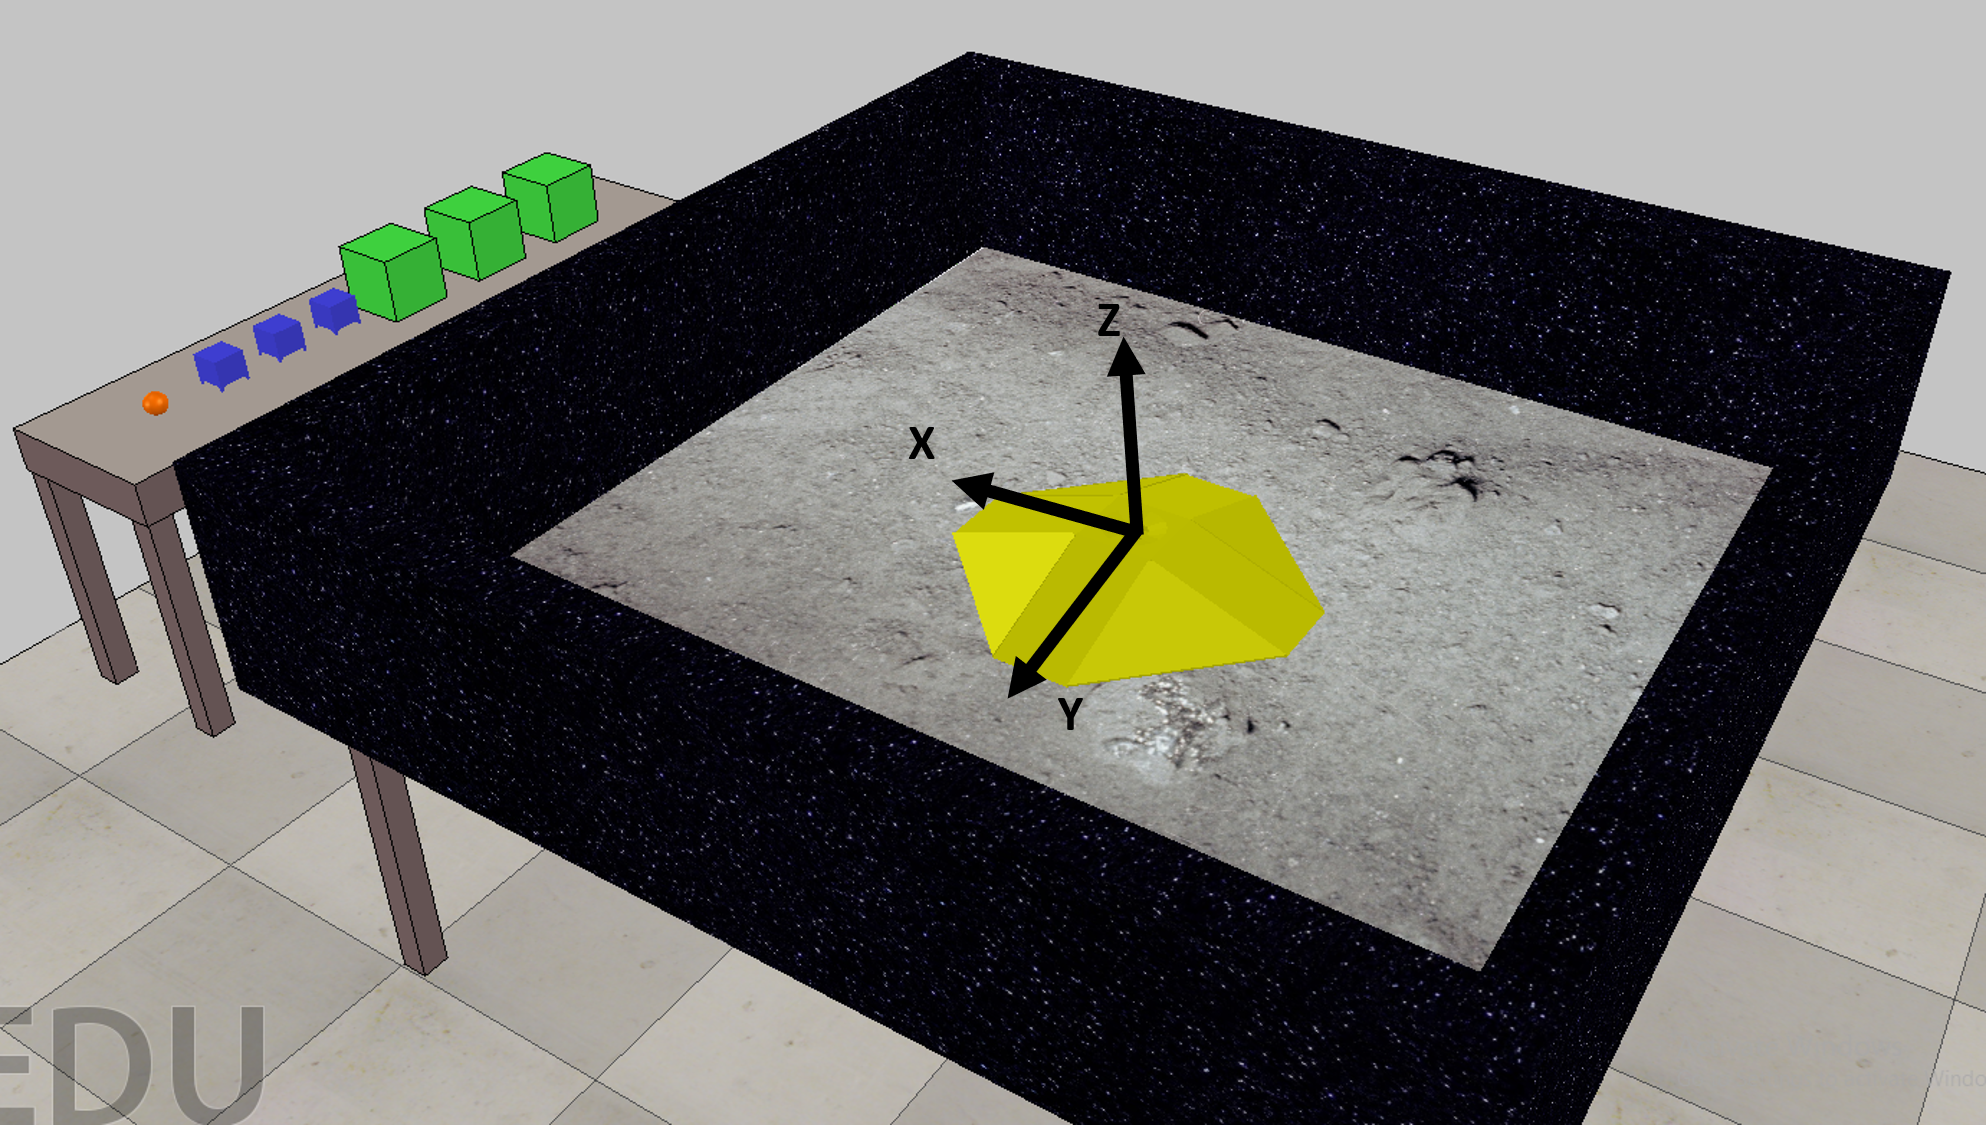
The robot coordinate frame is typically located on the robot. The robot coordinate frame moves around with the robot and hence it can move within the global frame. For our RoverBot robot the coordinate frame is located within the center of the robot, with the x axis pointing towards the front of the robot, the y axis pointing towards the left wheel and the z axis pointing skywards. This will mean that an object's position within the robot's coordinate frame can move with time, since the robot coordinate frame is moving.
Controlling Your VREP Robot Using Python
Interfacing to VREP with Python is quite trivial using VREP's Application Programming Interface (API). However, so you can concentrate on developing your navigation code we have created our own Python Module which simplifies it still. If you wish to know how to use the VREP API check out the VREP Python API Documentation and this tutorial.
To open a connection to VREP using the EGB320 LunarBot Python Module first create a new Python Script in the EGB320 VREP Python Code Folder. You need create your script in this directory as your script will be implicitly calling functions from the vrep.py, vrepConst.py and the remoteAPI files (.so for Linux, .dll for Windows, .dylib for Mac).
One issue that can occur is having a mismatch between the 32bit or 64bit version of the vrep .dll and your installed python version. If there is a mismatch then the python library dll import process usually throws an import error. The .dll we have provided is by default 64bit so please check to see if you are using a 64bit python installation and if not we recommend installing the 64bit python
Within your new script add the following code.
#!/usr/bin/python

# import the  bot module - this will include math, time, numpy (as np) and vrep python modules
from roverbot_lib import *

# SET SCENE PARAMETERS
sceneParameters = SceneParameters()

# SET ROBOT PARAMETERS
robotParameters = RobotParameters()
robotParameters.driveType = 'differential'	# specify if using differential (currently differential is only supported)

# MAIN SCRIPT
if __name__ == '__main__':

	# Wrap everything in a try except case that catches KeyboardInterrupts.
	# In the exception catch code attempt to Stop the VREP Simulator so don't have to Stop it manually when pressing CTRL+C
	try:
		roverBotSim = VREP_RoverRobot('127.0.0.1', robotParameters, sceneParameters)
		roverBotSim.StartSimulator()

		while True:
			roverBotSim.SetTargetVelocities(0.1, 0)  # forward and rotational velocity
			roverBotSim.UpdateObjectPositions() # needs to be called once within main code loop

	except KeyboardInterrupt as e:
		# attempt to stop simulator so it restarts and don't have to manually press the Stop button in VREP
		roverBotSim.StopSimulator()
Now run your script. The script should successfully connect to VREP and your robot should drive forward eventually crashing into the wall. Press CTRL+C to kill the script.
Now to explain the code.
from roverbot_lib import *This imports all the functions, classes and global variables from the roverbot_lib.py script. This will also import the Python modules math, time, numpy (as np) and vrep.
sceneParameters = SceneParameters()This loads up the default VREP scene parameters and stores them as a variable. The scene parameters include the starting ball position, as well as the positions of the 3 static obstacles. Later on we will discuss how to change the default scene parameters.
robotParameters = RobotParameters()
robotParameters.driveType = 'differential'		# specify if using differential (currently differential is only supported)
This loads the default robot parameters and stores them as a variable. We also specifically set the drive type to be differential. If you use a different mobility type like a skid steer with 4 wheels this should still work. We have depracted the use of an omnidrive system (contact the teaching team if you would like to utilise this type). The robot parameters include the minimum and maximum linear speed your robot can travel, the position of the robot's camera, how well your vision system can detect objects, and how well your sample collector system can "hold" onto the sample/ball. We will be discussing these parameters later on in this guide.
if __name__ == 'main'This is a Python capability. Essentially this says that if this is the main script being run, then perform the following operations; if this is not the main script (i.e. it has been imported by another script) do not perform the following actions. This is a great way to write Python modules and allow them to write test code.
roverBotSim = VREP_RoverBot('127.0.0.1', robotParameters, sceneParameters)This line of code creates an instance of the VREP_RoverBot class and stores that instance as a variable, in this scenario we have called that variable RoverBotSim. We have passed three arguments into this function, they are in order:
- The IP address of the computer running the VREP simulation environment. The '127.0.0.1' indicates the local computer. However, you could change this to the IP address of a different computer running VREP.
- The scene parameters.
- The robot parameters.
roverBotSim.StartSimulator()This will start the VREP simulator, which can also be done manually by pressing the Play button in VREP.
while True:
	roverBotSim.SetTargetVelocities(0.1, 0, 0)
	roverBotSim.UpdateObjectPositions() # needs to be called once within main code loop
The final lines above consist of an infinite while loop which constantly calls the SetTargetVelocities and UpdateObjectPositions Functions. The second line of code sets the velocities of our robot using the SetTargetVelocities function which takes three inputs. The inputs are the robot's desired linear velocity in the x direction, the y direction, followed by the desired rotational velocity. The units of measure are m/s and rad/s for the linear and rotational velocities respectively. These velocities are also specified within the robot's coordinate frame. In simple terms the x velocity is how quickly you want the robot to move forward and the rotational velocity is how quickly you want the robot to rotate. The third line calling the UpdateObjectPositions function is used to update syncronise the positions of the roverbot_lib and the simulator. If this is not called continuiously within your main loop your software will not use the latest positions of the sample and objects in the simulator.
RoverBot Python Module Functions
The documentation for the EGB320 RoverBot Python Module can be found here.
Hardware In The Loop
If you are undertaking the Navigation/AI component of this design project you may wish to perform what is known as hardware in the loop. Hardware in the loop is when we test parts or all of the hardware, in our case the Raspberry Pi, but utilise simulated data or a simulated environment (e.g. VREP). By performing hardware in the loop, you will be able to test your navigation software on the Raspberry Pi without having to have any other sub-systems. To perform hardware in the loop follow using VREP follow these instructions:
- First copy the navigation script from your computer onto the Raspberry Pi. You will also need to copy across the vrep.py, vrepConst.py, and the remoteApi_Pi.so files. These files all need to be in the same directory with your navigation script.
- Then navigate to the folder on the Raspberry Pi where you have saved/copied your navigation python script.
- Remember your Python navigation script needs to be in the same folder as the vrep.py, vrepConst.py and the VREP remote API shared library file. The shared API library file you require depends on your OS.
- If you copied the remoteApi.so file delete it; this was compiled for Ubuntu desktop and will conflict with our Raspberry Pi version.
- Rename the remoteApi_Pi.so to remoteApi.so.
- If the remoteApi_Pi.so file is not currently located within your navigation script folder, copy it from the VREP_PythonCode folder located in the downloadable zip file at the top of the page.
- Now ensure the Raspberry Pi and the computer you wish to run VREP on are on the same network (i.e. the QUT network).
- Get the IP address of the desktop/laptop computer you will be running VREP on.
- On the Raspberry Pi, in your python navigation script, change the IP address being passed into the VREP_RoverBot class creation function. For example:
RoverBotSim = VREP_RoverBot('pc_ip_address', robotParameters, sceneParameters) - Launch and start VREP on the computer as you usually would.
- Start your script on the Raspberry Pi.